
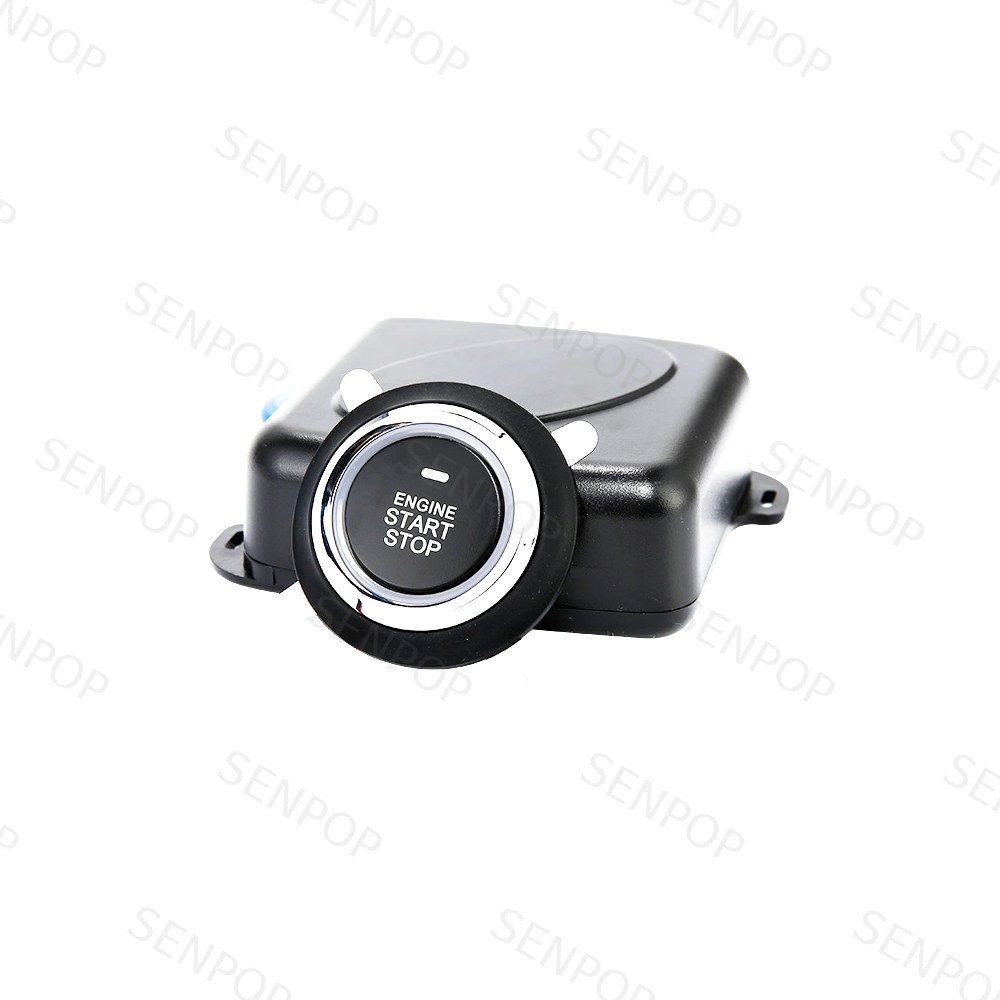
A lit button means the main unit has power. It does not mean the unit can start the car. Between "the button lights up" and "the engine cranks" sit six separate conditions, and any one of them failing produces exactly the symptom you are looking at.
First, a boundary. Our 9002 installation guide has a troubleshooting section, but it is written for the 9002's RFID platform. This article is the general diagnostic order that applies to any push button start kit in our range — the 9002, the 8807 series, the S-807R, the 8808RKE — because the failure modes sit in the vehicle, not in the badge on the button.
The order below is the value. Most technicians know these checks; the ones who lose an afternoon are the ones who run them out of sequence — replacing a starter before confirming the brake signal ever reached the module.
Before You Touch Anything
Why order matters more than knowledge
Each step below either clears a cause or finds one. Skip a step and two things happen: you can end up replacing parts that were never the problem, and — worse — you lose the ability to interpret the later checks, because several of them assume the earlier ones passed. Work top to bottom. If a step passes, move on; if it fails, you have found your fault and you can stop.
The one safety step
Before any measurement that touches the starter circuit: disconnect the battery negative terminal. The starter pull-in current is in the hundreds of amps, a slipped probe across the starter terminal can weld itself there, and an airbag circuit provoked by a stray 12V feed is a far more expensive afternoon than the five minutes the disconnect costs you. Reconnect it when the procedure calls for a live measurement, and disconnect it again before touching starter terminals.
What you need
A multimeter, the kit's installation manual for the specific model, and ten minutes. Nothing in the first five steps needs the car to be running.
Step 1 — Does the Button LED Behave Correctly?
The LED is the unit's own status output, and it is the cheapest diagnostic you have — but only if you know what the states mean for that model.
| LED state | What it usually means | What to check next |
|---|---|---|
| Not lighting at all | No power reaching the unit, or the unit's ground is lost | Fuse on the unit's constant 12V feed; ground connection; harness seated |
| Lit steadily | Unit powered, normally in a ready/disarmed state | Move to Step 2 |
| Slow flashing | Model-specific. On many platforms this is an armed or standby state | Check the manual for the model |
| Fast flashing | Model-specific — often a fault or an input-missing signal | Check the manual; photograph the pattern and the count |
One confirmed example from our own range, so you can see what a documented state looks like: on the 9002, the button LED goes out when the immobilizer has armed — which happens 15 seconds after the engine is switched off. A 9002 owner who presses the button on a cold morning and sees a dead LED may simply be looking at an armed unit: touch the registered ID card to the concealed sensing coil, listen for the double beep that confirms disarming, and try again. That is not a fault; that is the product working.
For the other models we supply, the LED meanings are documented in each unit's manual rather than on our product pages — and they differ between models. Do not read a two-flash pattern on an 8807 as if it meant what it means on another brand's unit. If the manual is not in the box, tell us the model and we will send the LED code table for it.
If the LED is wrong — dead on a unit that should show a ready state, or a fault pattern — stop here. Everything downstream assumes the unit is powered and awake.
Step 2 — Is the Brake Signal Reaching the Module?
On automatic-transmission kits, the brake input is not a convenience feature — it is a required interlock. The unit refuses to crank without it, because cranking an unbraked automatic in gear is exactly the accident the interlock exists to prevent. A missing brake signal produces the exact symptom in this article's title: a lit button and nothing else.
How to measure it: backprobe the module's brake input wire while an assistant presses and holds the pedal. You are looking for the unit's expected signal — on most kits a 12V feed that appears when the pedal goes down. The manual states the expected value and whether the input wants positive or negative trigger.
The polarity mistake: some vehicles switch the brake lamp circuit to ground rather than feeding it 12V. If the kit expects a positive signal and the vehicle provides a negative one, the input never sees what it wants. If your measurement shows the opposite polarity from the manual's expectation, that is the fault — and the fix is the kit's documented way of inverting the input, not a guessed wire swap.
Step 3 — Does Ignition Stay Powered During Cranking?
Here is a cause that is documented in publicly available installation manuals for kits in this category — it is one of the most common causes listed there, but it is not a law of every vehicle, so verify rather than assume.
The sequence: you press the button, the unit switches the ignition lines on, then engages the starter. On some vehicles, the load of the starter motor pulls the vehicle's electrical system down hard enough that the ignition line the kit is using drops out during cranking. The unit sees its own ignition feed vanish, cancels the start, and the engine never cranks. Symptom: button lights, one click or silence, no crank.
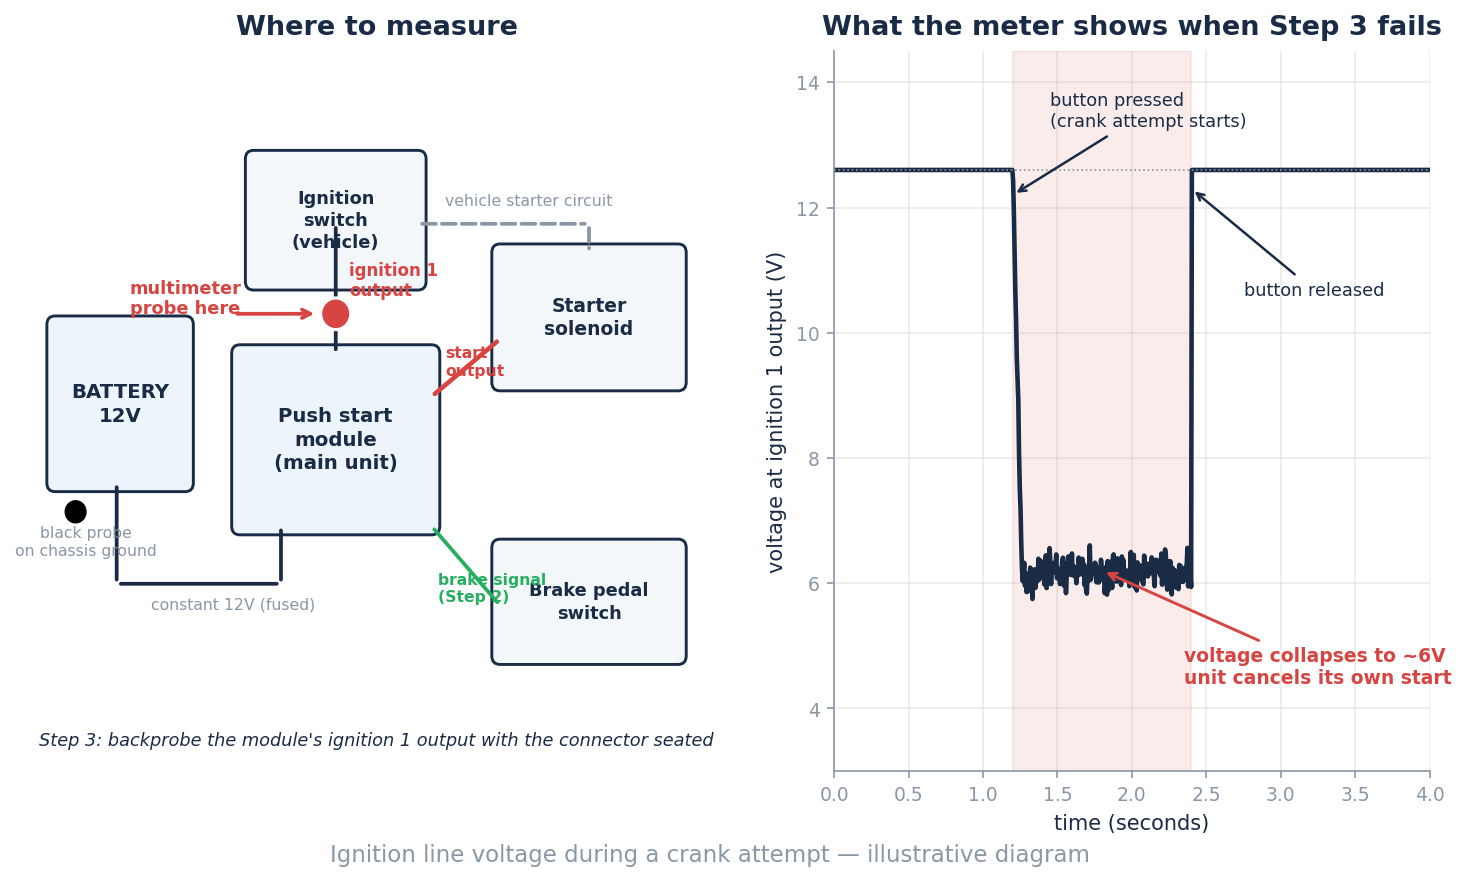
How to test it: multimeter on the kit's ignition 1 output, assistant holds the button. Watch the voltage at the moment the starter is told to engage. If it collapses from battery voltage toward single digits for as long as the crank is attempted, you have found it.
The documented workaround is a relay: use the kit's ignition output to control a separate relay whose contacts carry battery power from a fused, direct feed. The unit's logic then never sags, because the load is no longer running through the vehicle's ignition switch circuit. Whether your installation needs this depends on the vehicle — it is a per-vehicle finding, not a default step.
Steps 4 to 7 — From Relay Click to Fuel
Step 4: Is the starter relay clicking?
With the brake signal confirmed and the button pressed, listen for the click of the kit's start relay (or the vehicle's starter solenoid). A click that is present moves the fault downstream of the kit; total silence keeps it upstream, in the inputs you checked in Steps 1–3.
Step 5: Is the original chip inside the detection coil?
On vehicles with a factory immobilizer, the transponder chip around the steering column must see the key — or an emulator — during the start attempt, or the engine is deliberately refused. The kit can crank the engine perfectly and the car will still not fire, because the factory system is doing its job. We cover the full mechanism — and why the chip must stay where the factory put it — in Push Button Start Kits Need the Original Transponder Chip.
Step 6: Does the starter motor actually turn?
⚠️ Battery negative disconnected for anything in this step. Never bridge the starter terminal directly with a screwdriver on a vehicle you care about. If the relay clicks and the solenoid clicks but the motor does not turn, the fault is in the heavy circuit: battery state, the main positive lead, the engine-earth strap. A starter that turns slowly, as if the battery were flat, on a battery you have just verified — that is usually the earth path, and on 24V commercial vehicles it is the single most common heavy-circuit fault.
Step 7: It cranks but will not fire.
Congratulations — your push button kit is fine. Cranking is the kit's job; firing belongs to fuel, compression and spark, and from here the diagnosis leaves this article. The one kit-related possibility worth ruling out first is Step 5's immobilizer refusal, because it is the only cause in that family that an aftermarket installation can create.
The Printable Summary
| Step | Observe | If it fails | Action |
|---|---|---|---|
| 1. Button LED | Dead, or a fault pattern | Unit not powered / armed / fault state | Fuse + ground; on 9002 touch the ID card; else consult the model's LED table |
| 2. Brake signal | No expected signal at module input | Interlock never satisfied | Backprobe the brake input; check polarity against the manual |
| 3. Ignition under crank | Ignition line collapses during crank attempt | Unit cancels its own start | Verify with meter; fit the documented relay workaround |
| 4. Relay click | Silence with inputs confirmed | Fault upstream | Recheck Steps 1–3 |
| 5. Transponder | Cranks, never fires | Factory immobilizer refusal | Key or emulator inside the coil — see our chip article |
| 6. Starter motor | Solenoid clicks, motor dead | Heavy circuit | Battery negative OFF; battery, main lead, earth strap |
| 7. Cranks, no fire | Cranking normal | Fuel / compression / spark — not the kit | Standard engine diagnosis |
When to Stop and Call Us
Three symptoms we want photos for: the exact LED pattern (a short video is better — the count and rhythm matter); the multimeter reading from Step 3 at the moment of crank; the kit's label and the vehicle's year and engine type.
What to send us: the model, what the seven steps showed, and the two or three readings that surprised you. We will tell you which step your installation actually failed at, and — if the unit itself is suspect — what the replacement path is. Use the contact form or WhatsApp; the fastest replies come with the video attached.
Frequently Asked Questions
The LED flashes twice. What does that mean?
It depends entirely on the model, and the meaning is documented per unit. Our product pages do not publish LED code tables — the manual that ships with the unit does. If you do not have the manual for your model, send us the model and the exact pattern (count and rhythm, a phone video is ideal) and we will send the table for it.
Can this be a faulty unit?
It can, but it is the last explanation, not the first. In the order above, a faulty unit is only confirmed once Steps 1–3 show the unit is powered, receiving its brake signal, and holding ignition through crank — and still refusing to engage the relay. Diagnose the vehicle first; the unit is the most replaced and least often guilty part in this chain.
My car has a factory start button. Is this different?
Yes, in one important way: a factory system is integrated with the vehicle's security platform and knows the car's state directly. An aftermarket kit infers the car's state from wires — brake input, ignition feed, chip detection — which is exactly why the checks in this article exist. The symptoms look the same from the driver's seat; the diagnosis is not.
Why does it work sometimes and not others?
Intermittent no-crank usually lives in a connection, not a component. The order is the same, but watch for the state that changes: brake signal present only when the pedal is pressed hard, ignition that drops only when the engine is hot, an earth strap that reads fine cold and badly warm. If the fault reproduces with temperature or vibration, it is a connection, and Steps 2, 3 and 6 are where to catch it.
Stuck at one of the seven steps?
Send the model, the LED pattern and the Step 3 reading, and we will tell you which step your installation actually failed at.
Contact SENPOP →Related Reading
- 9002 Push Button Start Installation Guide — the 9002-specific troubleshooting section
- Why the Original Transponder Chip Must Stay in the Coil — Step 5 in full
- How to Choose a Push Button Start Kit — before the install, not after
- All Push Button Start Systems — the full range